How to Take Consistent Before-and-After Photos for Botox and Filler

Introduction
You sit down with a patient three weeks after their lip filler session. They want to see the result. You open their record, pull up the baseline, and the comparison is useless — the before photo was taken at rest under fluorescent ceiling light, the after was shot smiling near a window. The volume change you actually delivered is invisible. The conversation about a top-up stalls.
This is the most common photography failure in aesthetic medicine, and it has nothing to do with camera quality. The patient has not changed; the photographic conditions have. Inconsistent positioning, mismatched animation states, and unrepeatable lighting produce before-and-afters that cannot demonstrate the work you did — and cannot help you decide whether to top up, switch product, or change technique.
This guide is for practising injectors — aesthetic nurses, aesthetic doctors, and medspa owners — who already know how to inject and want a repeatable photography workflow that holds up across visits, across injectors, and across years of patient records.
This article is educational, not legal advice. Final compliance depends on how your practice configures and uses the tool, your contracts, and the laws that apply in your jurisdiction.
Why Botox and Filler Photos Are Harder Than They Look
Aesthetic photography is more demanding than most clinical photography because the changes you are documenting are subtle and often only visible in motion.
A wound either closes or it doesn't. A skin lesion either resolves or it doesn't. Filler and toxin live in a different category — a 0.5ml lip enhancement, three units of glabellar toxin, or a soft tear-trough correction can be transformative on the patient's face but invisible in a poorly framed comparison. Add a millimetre of head tilt, a different smile intensity, or a window instead of an LED panel, and the difference disappears into noise.
Three things compound the problem. First, the face is the most expressive area you photograph, so animation state matters as much as resting position. Second, patients evaluate their result visually — if your comparison cannot show the result, the consultation cannot close. Third, aesthetic photos are increasingly used for patient marketing, so they have to look professional in addition to being clinically accurate.
The good news is that none of this requires expensive equipment. It requires the same thing every other branch of clinical photography requires: controlled variables. For a deeper grounding in those fundamentals, read medical photography best practices — the positioning, lighting, and lens principles in that guide are the foundation everything below builds on.
Build a Repeatable Photo Setup
Before you decide which views to capture, decide where you are going to capture them. The single biggest improvement most injectors can make is to designate one location in the clinic and use it for every aesthetic photograph, every patient, every visit.
Lighting
Mixed lighting is the most common failure mode. A consultation room with a window, an overhead fluorescent, and a desk lamp produces a different photograph at 9am than at 4pm, and a different one again on a cloudy day. None of those photos will compare to each other.
Use two identical light sources at 45° to the patient and turn off everything else, including the window. LED panels designed for video work well, are inexpensive, and produce a consistent colour temperature. Aim for 5000–5500K so skin tone reads accurately and is reproducible across visits. If you are photographing darker skin tones, cross-polarised LEDs or matte diffusers reduce the surface glare that washes out detail under harsh light.
The principle is reproducibility, not perfection. A clinic with one slightly dim LED panel that never moves will produce more useful comparisons than one with studio lighting that gets adjusted between patients.
Background
A plain, mid-tone background is non-negotiable for aesthetic comparisons. The retail standard is medical-photography light blue or a neutral mid-grey. Avoid white walls (they blow out and shift the camera's exposure between visits), patterned wallpaper, or anything that varies — including your reception area's seasonal decor.
A roll-down photographic backdrop or a single painted wall is enough. The background's only job is to disappear and stay the same.
Camera distance and lens
Wide-angle lenses distort facial proportions. The "selfie effect" makes noses look larger, lips look fuller than they are, and jawlines look softer. That distortion changes between baseline and follow-up if the camera moves even slightly, and it makes filler results unreliable to assess.
Use a 50–60mm equivalent focal length, which corresponds to "portrait mode" or "2x" on most modern smartphones. Position the camera at least one metre from the patient for facial work. If both ears are not visible in a frontal photograph, you are too close or the lens is too wide.
Mark the floor with a strip of tape so the patient stands in the same spot every visit. Mark a second strip for the camera or tripod. This single change eliminates more inconsistency than any other.
Patient positioning
Use the Frankfort Horizontal Plane as your reference for head tilt — the imaginary line from the top of the ear canal to the lower edge of the eye socket should be parallel to the floor. Tilt the patient's chin up and the jawline lengthens; tilt it down and submental fullness appears. Either way, the comparison is invalidated.
Have the patient look at a fixed point at eye level (a small dot on the wall behind the camera works), shoulders relaxed and level, hair pulled back uniformly across visits. Document the positioning so the next person photographing this patient — even if it is a different injector or a new front-desk staff member — replicates it exactly.
Patient preparation
Set a written standard for patient prep and apply it every time:
- All facial makeup removed, including brow product and lip colour
- Hair pulled back the same way (low ponytail or surgical cap)
- A neutral cape or drape over clothing
- No jewellery in the photographed area
- Patient seated in the same chair, at the same height, every visit
These are small details that compound across visits. A patient with full glam at baseline and bare skin at follow-up will produce a comparison that looks like a different person.
Standard View Sets by Treatment Area
Once the setup is fixed, the next decision is which views you take. Define a view set per treatment area, write it down, and capture every view every time. The fastest way to ruin longitudinal comparisons is to take "whatever views feel relevant" each visit.
Toxin (Botox, Dysport, Xeomin)
For neuromodulator work, the comparison is almost entirely about animation. Capture each of the following at baseline, two-week follow-up, and any maintenance visit:
- Frontal at rest
- Frontal at maximum frown (glabellar)
- Frontal at maximum brow elevation (frontalis)
- Frontal smiling fully (orbicularis, crow's feet)
- Left and right oblique (45°) at rest and at the relevant animation
- For masseter or jaw slimming: frontal and lateral at full clench
The static frontal-at-rest is necessary but rarely the most useful comparison. The animation views are what show the patient — and you — whether the dose worked.
Lip filler
Lip filler comparisons fail more often than any other treatment because lips change shape with every facial movement. Capture:
- Frontal at full rest, mouth gently closed
- Frontal smiling naturally (showing teeth)
- Frontal with lips slightly parted (relaxed)
- Left and right lateral profile at rest
- Three-quarter (left and right oblique) at rest
- Optional: a short video of the patient saying a standard phrase, captured at every visit
The lateral profile is essential — it shows projection and shape changes that frontals miss. Most patients judge their lip work in profile, even if they would not say so explicitly.
Cheek and midface filler
For cheek, midface, and zygomatic work the relevant comparisons are about projection, contour, and lift. Capture:
- Frontal at rest
- Frontal smiling (the cheek apex moves with smile — capture both states)
- Three-quarter oblique left and right at rest
- True lateral profile left and right
- Submental view (looking up from below) for projection assessment
Three-quarter views are doing the heaviest lifting here. Frontal photos understate cheek volumisation; the oblique view shows the apex and the curve from cheek to jawline.
Jawline, chin, and jowl
Jawline filler, chin filler, and pre-jowl correction all need lateral and oblique views to compare meaningfully. Capture:
- Frontal at rest
- Three-quarter oblique left and right
- True lateral profile left and right
- Submental view (45° upward) for jaw definition
- Frontal with teeth gently closed (to neutralise the masseter)
The frontal view alone will not show what filler did to a jawline. The lateral and three-quarter views are where the work becomes visible.
Tear trough and under-eye
Periorbital photography is unforgiving — small changes in light angle or head tilt change the appearance of hollows entirely. Capture:
- Frontal at rest, eyes open, looking straight at the camera
- Frontal looking slightly upward (this exposes the tear trough)
- Three-quarter oblique left and right
- Submental (looking up from below) to show pre-existing pseudo-bags
If your lighting is even slightly inconsistent across visits, tear-trough comparisons will look like the filler did nothing — or worse, made things worse — when in fact the underlying anatomy is identical and only the shadow has changed.
Animation States: The Variable Most Injectors Skip
The single biggest gap in aesthetic photography is failing to capture matched animation states.
A toxin patient photographed at rest before treatment and frowning after treatment will look as though nothing happened. A lip filler patient photographed smiling at baseline and at rest at follow-up will look like the filler dissolved. The treatment may have been textbook; the documentation will not show it.
Define a fixed sequence per treatment and follow it every time:
- For glabellar toxin: rest, then maximum frown, then surprise (frontalis activation)
- For crow's feet: rest, then full smile showing teeth
- For masseter: rest, then full clench
- For lip filler: rest, then natural smile, then lateral at rest
- For cheek filler: rest, then natural smile
Cue the patient in the same words every visit. "Show me your worst frown — like you're trying to make the line as deep as possible." "Smile naturally, like you're greeting someone." "Relax your face completely, lips just touching." Verbal scripts produce more consistent expressions than freeform direction, which is why broadcast and clinical photography both rely on them.
Match the Baseline: Distance, Angle, and Framing
A comparison is only as reliable as its closest match to the baseline photo. At every follow-up visit, your goal is to reproduce the original photograph, not take a new one of the same patient.
Three techniques make this practical in a busy clinic.
Floor markers. Mark the patient's foot position and the camera position with tape. This single intervention eliminates most distance and framing drift.
Reference photos at the photo station. Display a small printed or on-screen reference set showing the standard views and animation cues for each treatment. Staff stop guessing.
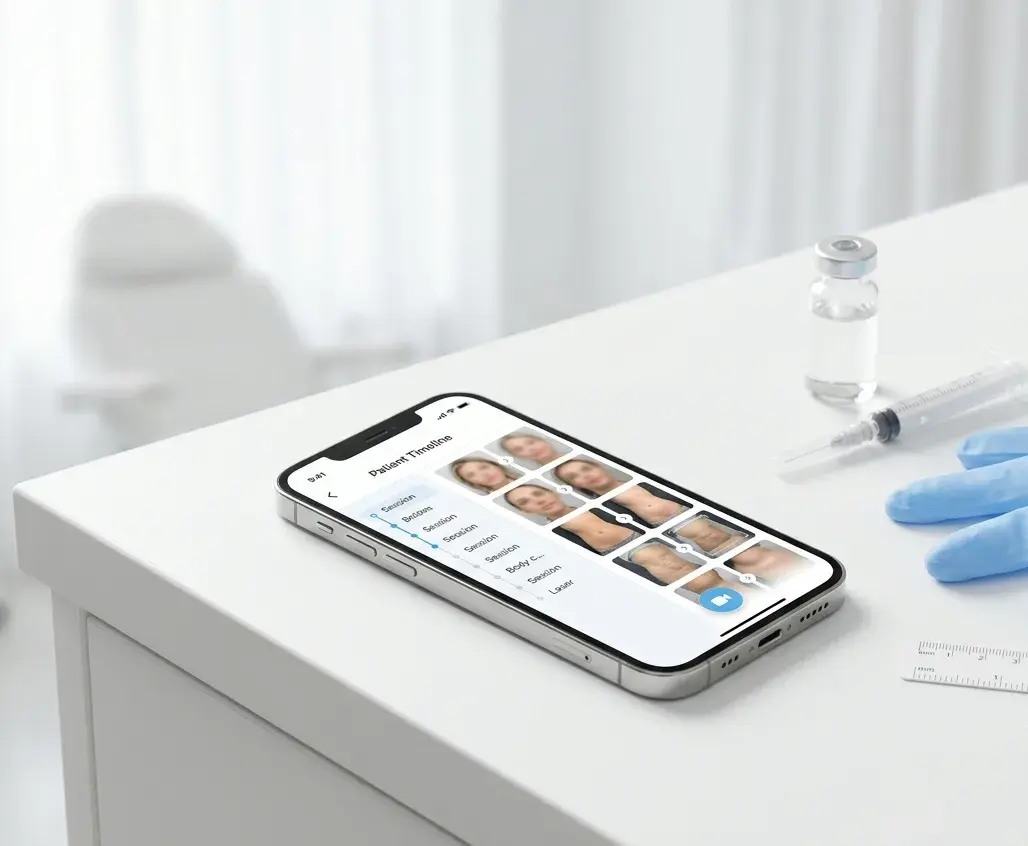
Ghost-image overlays. A semi-transparent overlay of the patient's previous photo on the camera viewfinder lets you align the new shot exactly to the baseline — head tilt, distance, facial position, all matched in real time. PixioDoc's adjustable ghost overlay is built specifically for this; you select any previous photo for that patient and shoot the new one against it.
The third technique, when available, is the most powerful. You will not get every visit perfectly aligned without an overlay, even with floor tape and reference prints. With one, follow-up photos snap into the same frame as the baseline almost automatically. After the follow-up comparison lands in the chair, a patient progress report gives the patient a takeaway PDF — aligned views and a treatment summary they can revisit once they are home.
A Capture Workflow That Survives a Busy Clinic
Knowing what to capture is different from actually capturing it on a Tuesday afternoon when you are running 15 minutes behind.
The clinics that maintain consistent aesthetic photography over years do three things in their workflow.
They define the view set in advance. Before the patient arrives, the chart says "lip filler follow-up, view set L3." Staff know exactly which six photos to take. No improvisation, no skipped views.
They capture the full set without reviewing in between. Stopping after every photo to check the screen breaks the patient's positioning and roughly doubles the time spent. Capture the full set, then review the strip and re-take any that did not work.
They anchor every photo to the patient and visit at capture, not afterwards. A photo that lives in the camera roll for an hour before being filed is a photo that is at risk of ending up in the wrong record, getting auto-uploaded to a personal cloud, or being lost entirely.
PixioDoc's multi-capture camera was designed for this workflow specifically — you take all the views in one pass without leaving the camera interface, see thumbnails in a strip beneath the viewfinder, drop any substandard frames before saving, and the whole set is automatically attached to the right patient and visit. In practice this cuts photography time by roughly half versus stopping to review each shot.
Compliance and Storage: Where Most Medspas Get It Wrong
The technique above is necessary but not sufficient. Where aesthetic clinics most often fall down is what happens to the photos after they are taken.
In aesthetic medicine the photo record is the product — it drives consultations, retention, and patient marketing. It is also protected health information. A face is an identifier. A distinctive lip shape, jawline, or set of features is an identifier. Aesthetic before-and-after photos qualify as special category data under GDPR Article 9 — and as protected health information under US HIPAA. The fact that the patient is paying privately for a cosmetic treatment does not change either classification.
Three storage patterns are common in medspas and all three are non-compliant by default:
- Photos taken on the injector's personal phone, sitting in the same camera roll as their family photos and auto-syncing to personal iCloud or Google Photos. This violates GDPR's data minimisation and security principles — and, for US readers, HIPAA's technical safeguards. We covered this in detail in why you shouldn't use your personal phone for patient photos.
- Photos shared between co-injectors over WhatsApp or iMessage. Consumer messaging apps cannot satisfy GDPR's requirements for clinical media — no DPA, no audit trail, no controlled access. The full case for moving off them is in sharing medical photos between professionals.
- Photos saved to a shared Google Drive or Dropbox folder named by patient. Personal accounts are non-compliant on principle; even Google Workspace and Dropbox Business require deliberate configuration plus signed data processing agreements before they can hold patient data. The detailed breakdown is in whether you can store patient photos in Google Drive under GDPR.
The compliant pattern is straightforward: capture aesthetic photos in a dedicated clinical app that never writes to the personal camera roll, store them in encrypted, access-controlled, audit-logged storage, and share with co-injectors through controlled, time-bound permissions rather than messaging apps. If you are evaluating tools, the buyer-focused checklist in what makes a medical photography app GDPR compliant lays out the ten features that actually matter.
PixioDoc was built around this pattern for medspas and aesthetic clinics specifically — patient timelines per injector and per clinic, one-swipe before-and-after comparison during consultations (Pro), encrypted EU-hosted storage, signed DPAs, role-based access for co-injectors, and audit-logged sharing. For injectables plus body contouring, laser, and peel patients in one record, see our medspa photo app workflow for all treatment types. The full overview lives on our aesthetic medicine page.
Common Mistakes That Make Aesthetic Comparisons Useless
A short list of failures we see repeatedly in real medspa records, and the fix for each.
Mismatched Animation States
Baseline at rest, follow-up smiling — and the comparison is meaningless. Define and document the animation sequence per treatment, write it on the chart, and never deviate.
Different Lighting at Every Visit
Window light at the morning consult, overhead fluorescent at the afternoon follow-up. The "result" you are looking at is mostly a lighting change. Use one designated photo location with the same two LED panels, always — and turn off everything else.
Camera Distance Creep
Slightly closer one visit, slightly further the next, multiplied by phone-camera lens variability between portrait mode and standard mode. Mark the floor for both patient and camera position, and fix the focal length so it never changes mid-set.
Hair and Makeup Variation
Glam baseline, bare-faced follow-up. The patient looks like a different person regardless of what you injected. Set a written prep standard — makeup off, hair pulled back the same way, jewellery removed — and apply it every visit.
Frontal-Only Documentation
Especially common for cheek, jawline, and chin work. Frontal photos understate three-dimensional volume changes; the work shows up in obliques and laterals. Capture obliques and laterals as part of the standard set, not as optional extras.
Photos That Never Enter a Patient Record
Sitting in the camera roll, named by date, with no association to the patient. By the next follow-up nobody can find them, and any that auto-uploaded to a personal cloud are now a compliance problem. Capture into a clinical app that anchors photos to the patient and visit at the moment of capture.
Marketing Reuse Without Separate Consent
Treatment-documentation consent does not cover social media or website publication, no matter how broadly the form is worded. Use a separate, explicit, written consent for any image used outside the patient record, specifying the channel, the duration, and the patient's right to withdraw.
Frequently Asked Questions
What is the best camera for aesthetic before-and-after photos?
A modern smartphone with portrait mode (50–60mm equivalent focal length) is sufficient for aesthetic photography in almost every case. Lens distortion, lighting, and patient positioning are far more important than camera resolution. What matters is using the same camera, the same focal length, and the same distance for every photo of every patient — not whether the camera is a DSLR or a phone. A consistent iPhone setup will produce more clinically useful comparisons than an inconsistent professional rig.
How many before-and-after photos should I take per Botox or filler patient?
Capture a full standard view set per treatment area, every visit, without exception. For toxin work, that typically means six to eight views (frontal at rest, frontal at the relevant animation, oblique left and right at rest, oblique left and right at animation, plus area-specific views). For lip filler, plan on six to seven views including profiles. For cheek, jawline, and chin, plan on five to seven. Defining the view set in advance and capturing it identically every visit is what makes longitudinal comparison work — capturing "a few photos, whichever feel relevant" is what destroys it.
Should I capture animation states for filler, or only for Botox?
Animation states matter for both. For neuromodulators, animation is the comparison — frowning, smiling, raising brows, clenching. For lip filler, smiling and at-rest comparisons reveal different aspects of the result; cheek filler animates with smile; jawline filler interacts with masseter activity. The principle is universal: capture both rest and the dominant animation state for the treatment area, and capture the same states at every follow-up visit.
How do I make before-and-after photos look the same across visits?
Three controls produce most of the consistency. First, fix the photo location — same room, same lighting, same background, every visit. Second, mark the floor for patient and camera position so distance and framing repeat. Third, use a ghost-image overlay (a semi-transparent reference of the previous visit's photo on the viewfinder) to align the new photo to the baseline in real time. With those three in place, follow-up photos snap into the same frame as the baseline almost automatically.
Are Botox and filler before-and-after photos covered by GDPR?
Yes. Aesthetic before-and-after photos that show identifiable patient features qualify as special category data under GDPR Article 9 — a face is an identifier. Storing them in a personal camera roll, sharing them on WhatsApp, or holding them in a personal Google Drive or Dropbox folder is not compliant. In the US, the same photos are protected health information under HIPAA. The fact that the treatment is elective and privately funded does not change the legal classification.
Can I post my patient before-and-after photos on Instagram?
Only with separate, explicit, written consent for that specific use. Consent to take treatment-documentation photos is not consent to publish those photos on social media or in marketing. The consent must specify the channel (Instagram, website, paid ads), the duration, and the patient's right to withdraw. Best practice is a dedicated marketing-use consent form, signed at the time the patient agrees to publication, and stored alongside the patient's record. Do not rely on a single broad clause buried in a treatment consent.
What's the fastest way to capture a full view set during a busy clinic day?
Pre-define the view set per treatment so staff know exactly what to take, capture all views in one pass without stopping to review between shots, and use a multi-capture camera that lets you see thumbnails in a strip and drop substandard frames before saving. Reviewing each photo individually breaks patient positioning, doubles the photography time, and produces less consistency. Capturing the full set and then editing the strip is faster and more reliable. PixioDoc's camera is built around this exact pattern.
Ready to make every before-and-after comparison clinically useful? Start free with up to 10 patients; upgrade to Pro for ghost-overlay capture, side-by-side comparison during consultations, and encrypted, EU-hosted storage with GDPR-aligned safeguards. Download PixioDoc to see how it works in your medspa.
Keep patient photos out of your camera roll
PixioDoc gives you a dedicated workspace to capture, compare, and share patient photos — organized by patient timeline, never mixed with your personal gallery.
EU-hostedEncrypted in transit & at rest
Keep reading
Medspa Photo App: Document Botox, Body, and Laser Treatments in One Workflow
How medspas document injectables, body contouring, laser, and peel results in one patient timeline — and what to look for in a medspa photo app.
Read article
The Before Photo Problem: Why Patients Don't See Their Own Results
The toxin settled exactly as planned, the filler is balanced — and the patient says it did nothing. Why patients are wired to miss gradual results, what that costs aesthetic clinics in rebookings, and the before-photo ritual that fixes it.
Read article
How to Take Professional Before-and-After Photos in Your Clinic
A camera-agnostic playbook for clinicians and medspas: lighting, framing, distance, and a smartphone workflow for before-and-after photos that look professional.
Read article